How to Load Spools into the Markforged FX20 3D Printer
How to Load Spools into the Markforged FX20 3D Printer.
In this video guide, learn how to load material filament spools into Markforged’s biggest composite 3D printer. In this step-by-step guide you will see close up how to operate the material bay, properly handle spools, and get every last CC out of your spools.
Alternatively you can read the step-by-step guide on this page.
Step by Step Guide: Loading the Markforged FX20 3D Printer
Get the Most Out of Your 3D Printing Filament
First, open the FX20’s material drawer and start the Load Material utility using the screen on the front of the FX20.
Then select the type of material you’re loading, and the type of spool. Then you want to select partial spool. Now, we do this because every spool has a bit of extra material for purges. By selecting partial spool you’ll get every last CC.
Opening, Preparing and Weighing Markforged Onyx Spool
Then open up the new spool, removing it from its protective airtight packaging. From this point onward try to be as quick as possible. Learn more about properly storing 3D printing materials in our Material Storage Guide by clicking here.
Then find the end of the spool of filament and clip it at a 45 degree angle. This makes it easier for the extruder to catch it. Next you need to weigh the spool, and enter the weight of the spool into the workflow on the screen.
Opening the Spool Bay, Loading Desiccant
Open the spool bay and put the desiccant packs in the storage bin. Make sure you only use the desiccant packs that came in the protective packaging with the spool, and throw away any old ones.
Load to Head or Preload for Automatic Material Changeover
Next you need to press preload if you’ve already got a spool in the machine, but otherwise press load to head. This is so that the FX20’s automatic material changeover knows which spool to use first.
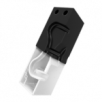
Loading the Spool, Feeding In the Filament
Get a demo 3D printed part for your workshop
As highlighted in the how-to video guide, we’re offering 3D printed sample parts and live demonstrations in the UK.
If you’d like to get a sample 3D printed on the FX20, or have a free consultation with one of our team, get in touch with us using the form on this page.
As promised, here are the links to resources from the video:


Learn more about the applications with the MarkTwo!
Which continuous fibers are suitable for which applications? How do I properly design for filament 3D printing? What do users say about this and where can I find more information? – You are right here! We have listed some information options that will take you straight to the right answers.


Leave A Comment