Skateboarding is a rough sport, on both the rider and the board. Both longboards (a subset of longer skateboards) and street skateboards (the type you’re probably used to seeing) suffer from edges splitting on impact as well as a phenomenon called “razor tail.” Razor tail happens because the kick tails (the two ends of the board) are slapped against the ground repeatedly and, being softer than pavement, they wear down to a sharp edge over time. On my longboard, the result looks something like this:
One tail of the board with the carbon fibre worn away at the tip.
What you see at the end there is the wood core and exposed carbon fibre edges. This happened pretty quickly, so I knew I needed a cover for kick tails to function as a skid plate. Commercial options are available but they’re thick, heavy, and incompatible with my board shape, so I stayed away from that option. I made thin Delrin sheets to bolt to the bottom, but they soon wore down and broke off. What I really needed was something light-weight and abrasion resistant that could wrap around my board’s tails, so I decided to use the Mark Two to 3D print some Kevlar-infused guards, custom fit to my longboard. The workflow to get there was surprisingly easy, and could be used to create custom, durable covers for anything from boats to PPE’s, so I thought I would share my process here.
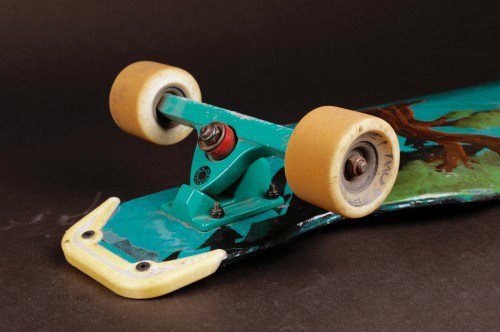
The finished, abrasion resistant skid plate bolted to the board.
Step 1: Trace and Photocopy a Template
Since I had no digitised version of my longboard’s tail shape, I traced it out on a piece of printer paper and scanned it so that I had a clean copy on my computer. Taking a picture may also work if the object is too hard to trace, but you risk dimensional inaccuracy because of the foreshortening of objects if you don’t take the picture straight on.
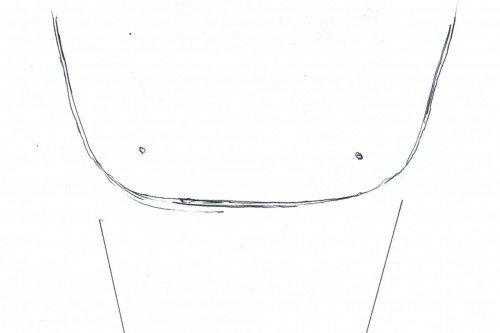
A rough outline of the tail of the board, sketched on printer paper.
Step 2: Import to CAD and Trace
Open up whatever CAD program you’re comfortable with (I used Fusion 360 in this case) and import the picture so that you can trace it. Make sure you have some dimension on the drawing that you can use to accurately scale it.
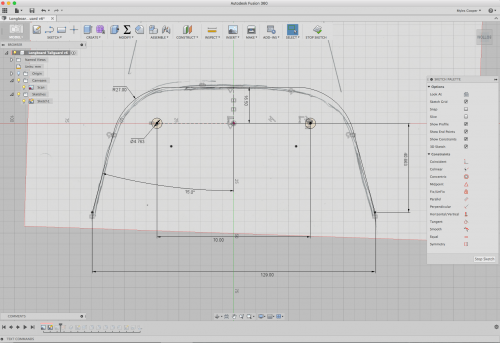
A sketch in Fusion 360 with the paper outline of the tail traced over with dimensioned lines.
Step 3: Model the Rest
In whatever way suits you, CAD your cover. For me, this meant creating a bottom plate that fit my bolt holes and then extruding a wall to wrap around the ends of the board. This wall will protect the board from impacts and scraping head-on with the ground.
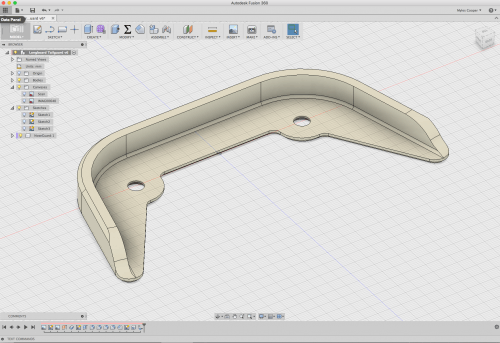
The finished CAD model of the tail guard in Fusion 360.
Step 4: Send to Printer
In Eiger, I put some extra Kevlar in the bottom few layers as well as Kevlar in the walls. This gave the covers long lasting abrasion resistance on all sides. Within a couple minutes, the covers were ready to print.
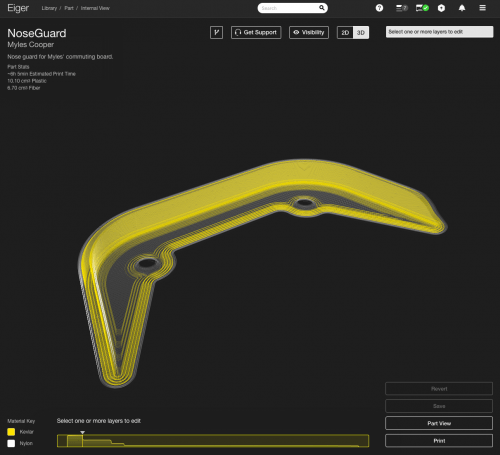
A visualisation of the Kevlar and Nylon tool paths in Eiger.
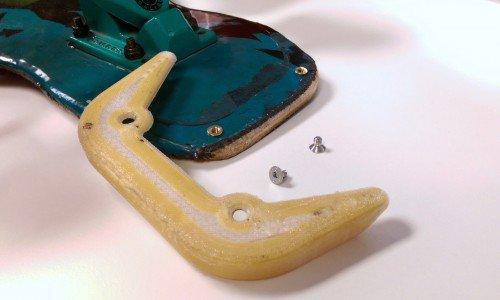
Step 5: Fasten and Ride Away
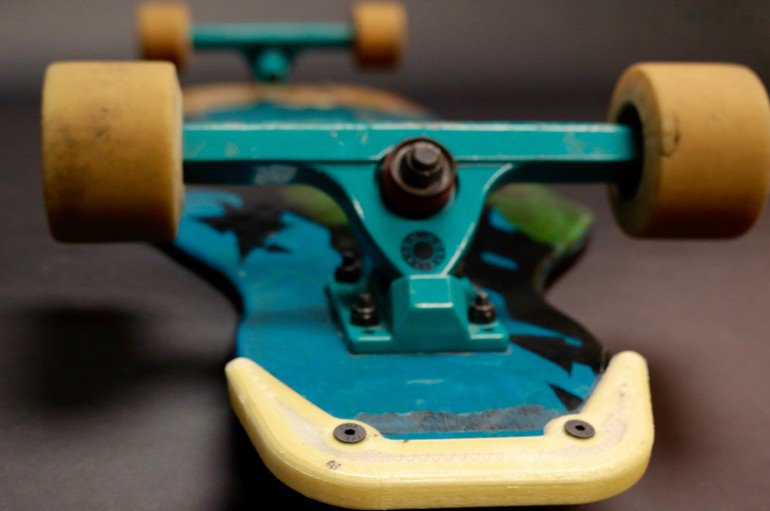
Once printed, all I had to do was press some threaded inserts into the longboard to let it accept a couple of machine screws. I bolted down the tail guards and was ready to try them out.
The tail guard and the board outfitted with press-fit inserts, ready to be assembled.
Results

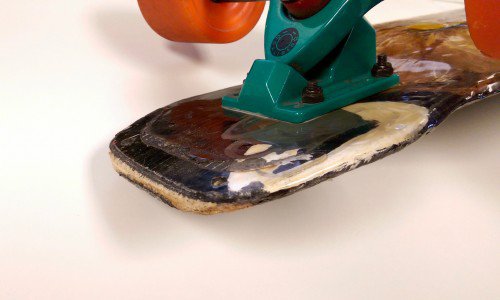
Before (left) and after (right) photo of the tail guard, showing the results of heavy abrasion against pavement and multiple impacts.
For the amount of abuse I put them through, these tail guards held up very well. To give them a thorough field test, I kicked the tails against the ground of a nearby car park over and over to simulate weeks of use, but the Kevlar barely showed any signs of wear (seen on left). Eventually I resorted to just dragging the tail against the pavement, and after a couple minutes I finally started cutting into the covers. Given the resilience of the guards from this test, it could take months if not years of normal riding to wear away these covers.
The failure point of the guards only happened when I started flinging the board straight into a pavement curb head on. After four or five direct collisions I managed to split a small corner and it started to delaminate. However, these types of head on collisions are rare enough that I’m not worried about this posing a problem during normal use.
So there you have it: An easy way to get great abrasion resistance in a lightweight, custom fit cover using the Mark Two. Now to start brainstorming what else this workflow could be used for…
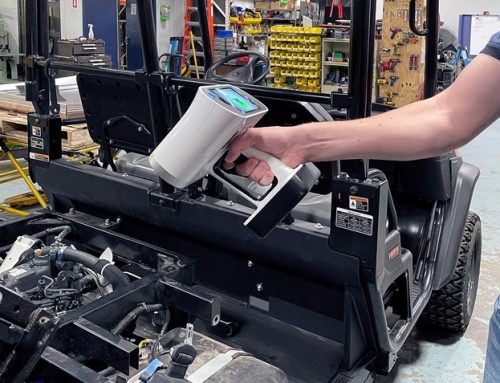

![Jet Dragster Racing [Video] with 3D Printed Parts](https://www.mark3d.com/en/wp-content/uploads/sites/6/2024/01/Josette-Roach-500x383.png)
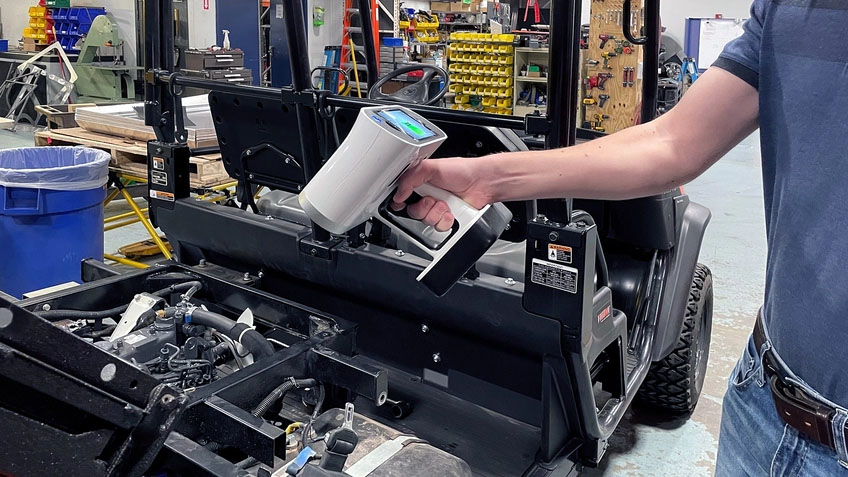
![Hollywood Propmaster [Video] 3D Printing with Markforged](https://www.mark3d.com/en/wp-content/uploads/sites/6/2024/01/Thingergy-26-scaled-500x383.jpg)
Leave A Comment