
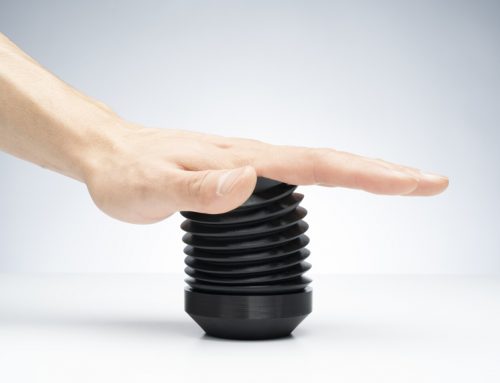
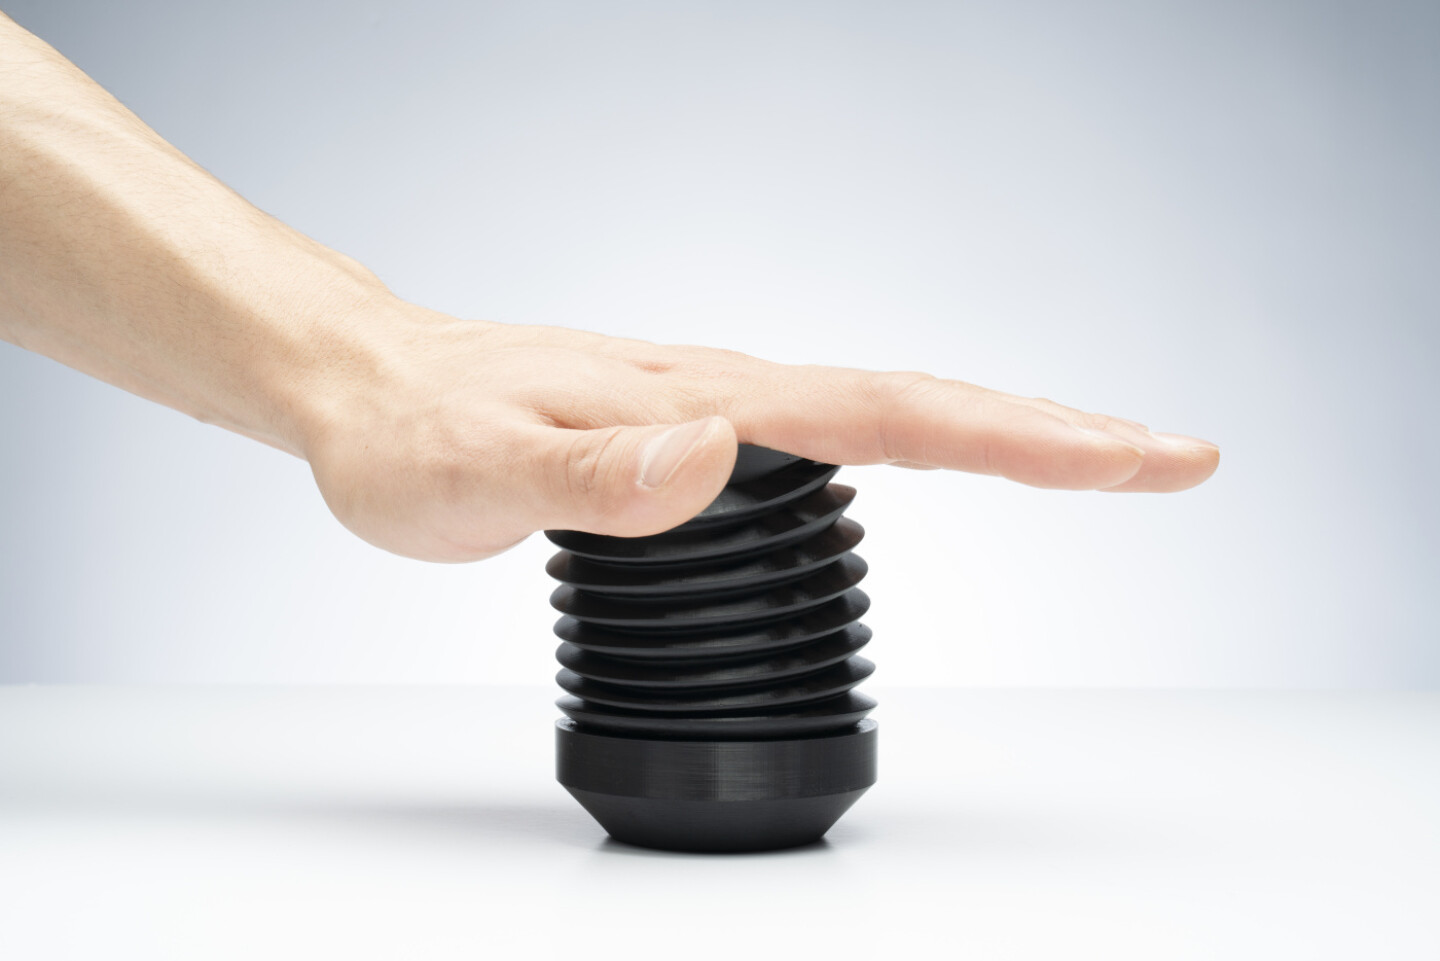
As you’ve seen from a few of our previous posts, every Friday we see what interesting things our creative employees have made at Part of the Week. Since the recent launch of our new Onyx filament, our applications team has been testing the limits of this industrial strength 3D printing material and discovering new ways to use it. Last Friday, Part of the Week went to my 3D printed shock absorber.
While I haven’t determined the spring constant yet, this 3D printed shock absorber springs back to its equilibrium position after being loaded.
So lets start from the beginning. As you may have seen from my reinforced living hinges post, I’ve been experimenting with the flexibility of our filaments. While Onyx is stiffer than Tough Nylon, when it is not reinforced it is still a bit pliable. When originally testing its overhang tolerance to showcase dimensional stability, I printed this part:
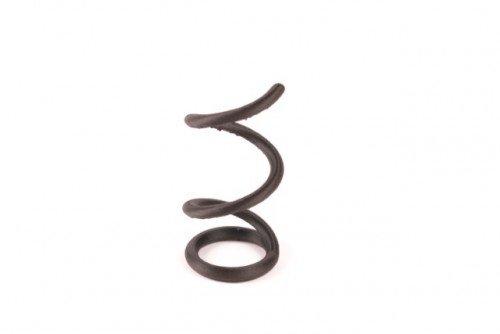
Originally printed as an overhang test, this print also shows you can make 3D printed springs with Onyx!
Initially to show how it handled overhangs, I then realized…it also functioned as a spring! It turns out that Onyx is strong enough and flexible enough in the Z direction to actually allow for 3D printed springs, both for extension and compression.
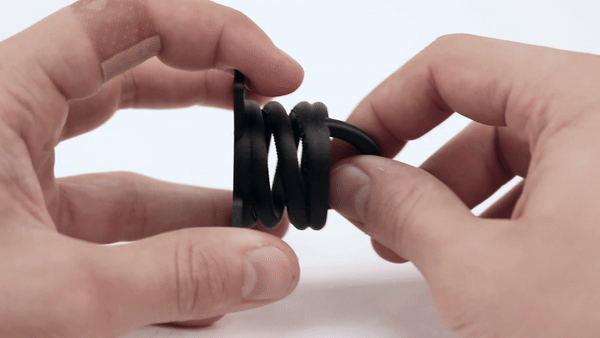
A 3D printed compression spring.
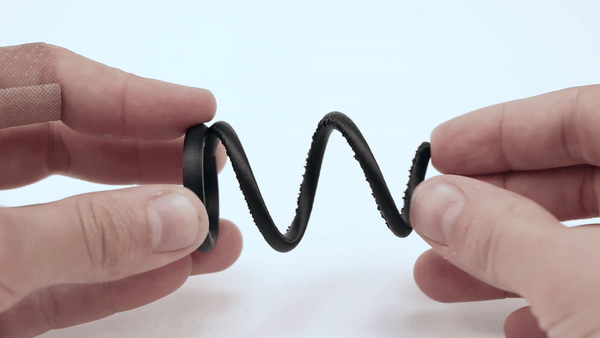
Another test I printed, this time a 3D printed extension spring.
By altering the dimensions: thickness, coil diameter, pitch, etc, I figure you can adjust the spring constant to create different damping behaviors, but this has yet to be tested. The compression spring was just a 3D printed coil with no support material, while the extension spring I actually designed with two coils, essentially making two springs in parallel. Both were printed without support material, so in the extension spring design, each section of coil is actually resting on the section below it.
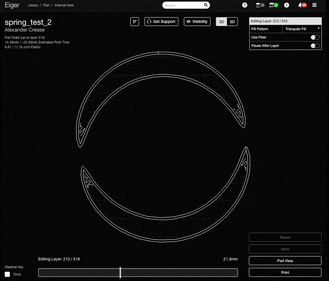
A few slices of the Extension spring in Eiger – each coil rested upon the one below it.
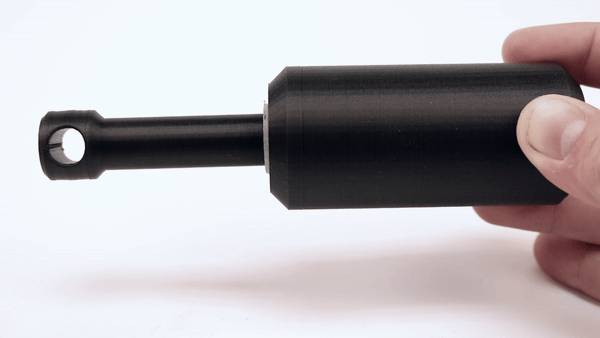
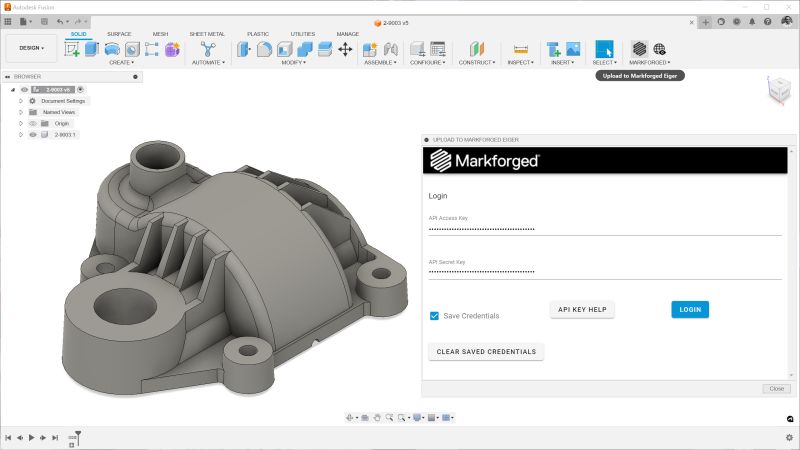
I then took this another step further to create the shock absorber. Instead of printing the springs exposed, I enclosed them in a cylinder and added a shaft and mounting holes.Everything in Onyx is actually a single part, so it is all connected. This had to be printed with no supports, or else it would be impossible to remove the ones on the inside! Here’s a cross section view of the shock absorber, modeled in Autodesk Fusion 360:
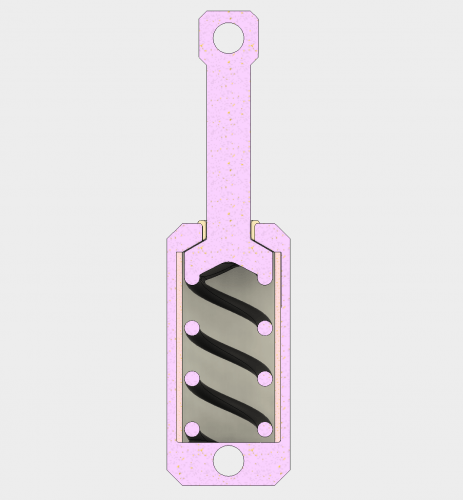
The cross section of the 3D printed shock absorber.
Note that there are actually three parts in this shock: the largest part is the main body, which includes the cylinder, shaft, and spring all connected and printed as one piece in Onyx. I was concerned for the friction between a few of the surfaces – including the spring contacting the inside wall of the cylinder, and the shaft rubbing against its hole through the top of the cylinder, so the other two pieces are printed in nylon. One is a sleeve to slide in to the inside of the cylinder, and the other a bushing for the hole in the top. our Tough Nylon is a bit smoother than our Onyx filament, and nylon is commonly used for bushing material, so I figured it’d be a neat way to use it.
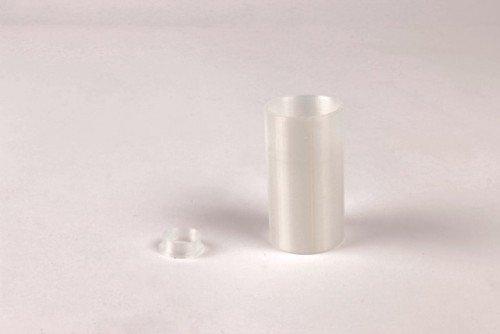
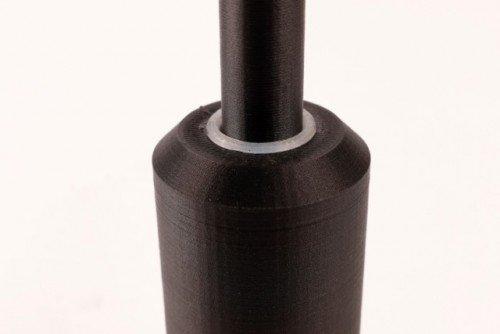
The 3D printed nylon sleeve and bushing to reduce friction in the shock absorber.
To avoid support material, I kept all angles under 60 degrees from the overhang, and calculated the pitch of the spring to ensure that it was an overhang the printer could tolerate. Like the extension spring above, I actually used two coils in this design to support the shaft of the shock.

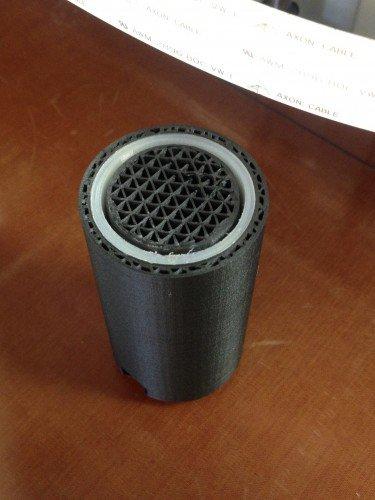
The inside of the 3D printed shock absorber, with two spring coils that connect to the cylinder, not pictured.
You’ll notice in the cross section view that the nylon sleeve is entirely encased in the shock body. To get it in, I printed the nylon sleeve and bushing first, out of nylon on a Mark Two. I then added two pauses to the shock absorber print. The first one was on the layer directly above where the nylon sleeve ends, to slide the nylon sleeve in. I then started the shock absorber print out of Onyx on a Mark Two Enterprise Printer, and waited (a long time) for the first pause.
A shot of the part mid-print, just after the nylon sleeve is put in. The Onyx prints directly over it.
I slipped the nylon sleeve in, resumed the print, and the Onyx filament printed right over the nylon. The next pause was after the top of the cylinder had finished printing, so that I could slide the bushing on. Once the print is complete, the bushing and sleeve are entirely encased in the shock absorber. With a little superglue, I fixed the bushing in place to prevent it from popping off.
The 3D printed bushing slides on to the shaft mid-print, just after the cylinder finishes printing.
And there you have it, a fully 3D printed shock absorber. I’d like to cycle test this at some point to see when it starts to fail, but the problem is, now that it’s fully enclosed I can’t really tell how it’s behaving…please comment or share if you have ideas for interesting ways to use this property of Onyx!
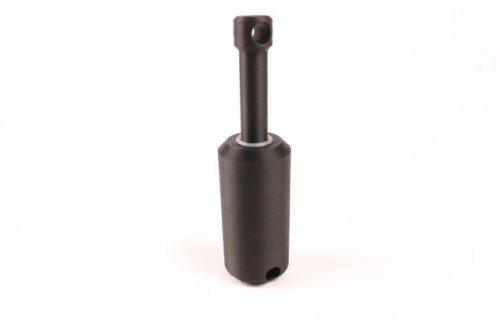
The full 3D printed shock absorber, with integrated nylon sleeves and bearings.
If you end up 3D printing anything cool with your Markforged printer don’t forget to share it with us on Twitter or Instagram!
Here are all the STL files and MFP files you’ll need to make the shock absorber:
Shock Body: STL and MFP (remember, if you use the STL, print with no supports! The pauses are in the mfp file at layers 758 and 880.)
Nylon Sleeve STL
Nylon Bushing STL
Sleeve and Bushing MFP
