Well-designed jigs and fixtures enable efficient, lean manufacturing processes, but the engineering investment required to produce them can be limiting to resource-constrained operations. Here, we show you how Markforged is using our Mark Two printers to improve our quality control processes by developing better manufacturing tooling with 3D printed parts.
Standing behind every Markforged printer is the reassurance that every subsystem has been rigorously checked by our Quality Control team for consistency and adherence to our precision engineering specifications. Quality testing every system of every printer comes with a cost however — each inspection step adds to the total manufacturing time of a printer, and a longer printer in-process time reduces our ability to quickly respond to unpredictable changes in demand. As a small, rapidly growing company, manufacturing agility is paramount to meeting our expanding customer base’s needs. As a result, Markforged has to be smart about how we validate sub-systems in manufacturing, in terms of both time invested in the actual inspection process, as well as engineering time required to develop it. For this reason, we often 3D print our manufacturing jigs and fixtures, as the Mark Two printer gives us the ability to rapidly prototype, test, and deploy process improvements for efficient use of our engineering and manufacturing time.
One particular example of the fast iteration that our printers enable us to achieve is a nylon extruder preload calibration jig we use in our manufacturing . The extruder is one of the fundamental building blocks of Fused Filament Fabrication (FFF) 3D printing. For a quick, high-level explanation of how an extruder works, see this well done guide from the RepRap Squad’s blog.
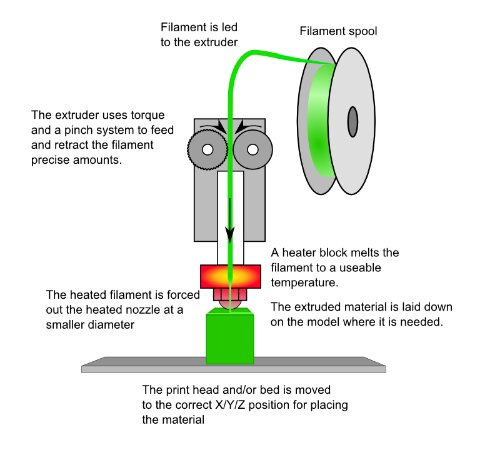
General overview of the different systems and processes in a 3D printer plastic extruder (source)
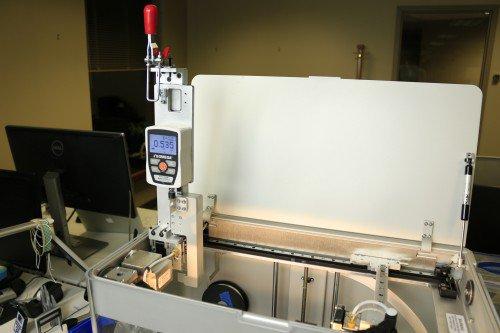
To guarantee consistent print quality across printers, all of our nylon extruders are checked to ensure that the ‘pinch system’ mentioned in the image above applies a force to the nylon filament that is within our engineering tolerance spec. This force is generated within the extruder by a pair of springs, whose pre-load, or level of initial compression, can be adjusted in order to modify the force exerted by the extruder. Initially, the process of calibrating this extruder was performed near the end of printer assembly using a jig designed by Phillip, one of our mechanical engineers who specializes in machine instrumentation, and assembled from pieces that we had waterjet cut and machined out of house with a fairly long, two week turnaround. While the jig produced extremely accurate results, it took a long time to actually receive and assemble its component parts, we found that we needed to modify the design when the parts came in, and finally had to spend more time re-working them on our own CNC mill in house. From a manufacturing standpoint, we also discovered as time went on that almost all of the extruders we were receiving from our supplier required adjustment. Since the in situ measurement jig was more difficult to precisely locate on the installed extruder than if the extruder was removed from the assembled printer, which added to our printer manufacturing time, we decided to develop a fixture that could quickly measure a batch of extruders as-received from our manufacturer, while it was still easy to access the adjustment screws.
The old inspection jig, mounted on one of the printers in our in-house farm
We had a couple design requirements in mind when we developed the new fixture. The first was to produce a fast, ex situ — off the printer — validation apparatus that an operator could use to calibrate batches of extruders at a time. The second was to incorporate a poka-yoke design, such that the extruder would fit into its receptacle bracket in one and only one way, preventing the operator from incorrectly calibrating the extruder by accident. Finally, the footprint was desired to be fairly compact — within a 12”x12” footprint envelope ideally, since it would live at our manufacturing facility and couldn’t take up too much bench space.
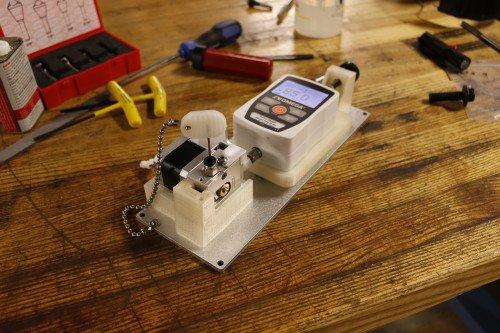
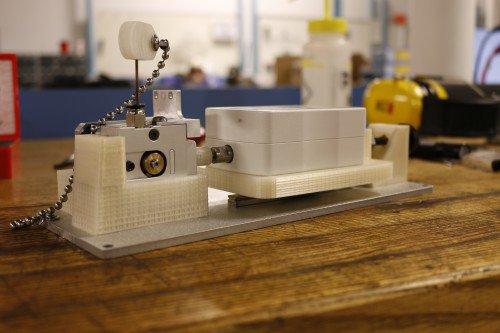
Fiberglass-reinforced precision calibration jig – a combination of COTS, waterjet cut and 3D printed parts
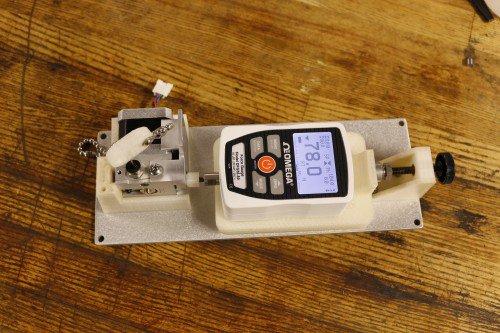
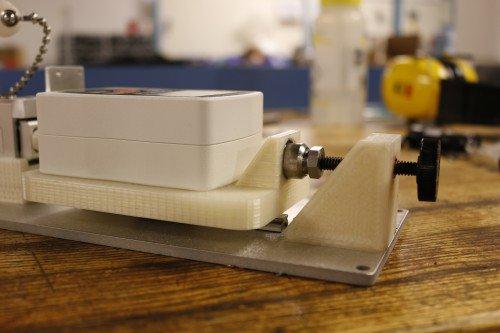
Bennett, another of our mechanical engineers, (whom you may remember from our post on living hinges and flexural elements) produced the final calibration jig you can see here. The entire system is based around an Omega force gauge (one of the DFG35 series to be exact). The nylon extruder is inserted into its receptacle on the left of the jig in the below image, with the floating spring-driven idler wheel that adds force to the system pointing towards the measurement probe of the gauge. The force gauge assembly is attached to a linear rail that allows it to slide freely along the axis of movement of the floating idler wheel. Finally, a thumb screw with a floating head is threaded through a melt-in brass insert such that rotating it will press the force gauge into the sprung idler assembly without imparting a torque on the gauge.
View of the Omega high precision force measurement gauge in action
Bennett added a number of features to this jig that are unique to both 3D printing and to industrial strength part manufacture with a Markforged printer. As you can see in the image below, he utilized a fiber placement technique that we call ‘fiber striping’ to add a few layers of fiber every 20-40 print layers, producing a part that is extremely strong while remaining cost- and material-efficient. Additionally, the extruder receptacle was produced quickly and inexpensively as a single part, with geometry that would have required costly CNC machining with multiple machine setups.
Notice the bands of fiberglass running through the fixture—the benefits of industrial strength 3D printing
The final product now lives in our manufacturing facility, where it has allowed us to re-arrange our quality control processes for more efficient use of our manufacturing technicians time, enabling us to bring more Mark Two printers into the hands of our customers.
A thumbscrew terminating in a floating head actuates the fixture


